The Hair Lover’s Mother’s Day Gift Guide: What to Actually Buy Her This Year
This post contains affiliate links. As an Amazon Associate I earn from qualifying purchases at no extra cost to you.
Let’s be honest — flowers are beautiful and chocolate is always appreciated, but if the mom in your life is serious about her hair, she probably has a running wish list of things she’d never splurge on herself. This year, give her something she’ll actually use every single day.
I put together this guide from my perspective as a stylist — these are the tools and products I recommend in the chair, the brands I trust, and the things that genuinely make a difference between a good hair day and a great one. Whether you’re shopping for your mom, your wife, your daughter, or honestly yourself — this list has you covered.
💇♀️ The Styling Tool She’s Been Eyeing
Shark FlexStyle HD430
If there’s one tool that’s completely changed the game for my clients, it’s the Shark FlexStyle. It dries, volumizes, curls, and straightens — all in one. No heat damage from switching between multiple tools, no fuss. Moms with textured hair, fine hair, or color-treated hair especially love this one because it’s so much gentler than traditional styling. This is the gift that makes her morning routine feel like a salon visit.
➡️ Shop the Shark FlexStyle on Amazon
🌀 For the Curl and Wave Lover
Paul Mitchell Express Ion Unclipped Curling Wand
This is one of my go-to wand recommendations for clients who want effortless, natural-looking waves without the learning curve. The clipless barrel means no creases, and the variable heat settings work for every hair type. If she’s been struggling to recreate salon curls at home, this is the answer.
➡️ Shop the Paul Mitchell Express Ion Wand on Amazon
BaByliss Pro StyleSwitch Multi-Styler
For the mom who wants options, the BaByliss Pro StyleSwitch is a versatile multi-styler that switches between styling heads so she can go from sleek to wavy without buying three separate tools. BaByliss Pro is a brand I trust completely — professional-grade quality at an accessible price.
➡️ Shop the BaByliss Pro StyleSwitch on Amazon
🔥 The Everyday Essentials She Deserves to Upgrade
BaByliss Pro Nano Titanium Straightener
Not all flat irons are created equal — and once you use a nano titanium plate, you can’t go back. This straightener heats up fast, glides smoothly, and cuts styling time in half. For color-treated or chemically processed hair especially, the even heat distribution means less damage over time. A truly professional-grade tool she’ll use for years.
➡️ Shop the BaByliss Pro Nano Titanium on Amazon
Hot Tools Pro Artist 1875W Blow Dryer
A great blow dryer makes everything easier — and the Hot Tools Pro Artist is one I recommend constantly. The 1875 watts of power means faster drying with less heat exposure, and the ionic technology kills frizz while it dries. If she’s still using a drugstore dryer, this upgrade will genuinely change her life.
➡️ Shop the Hot Tools Pro Artist Blow Dryer on Amazon
🧴 Salon-Quality Hair Care She Can Use at Home
The right products make everything her stylist does last longer between appointments. These are the brands and lines I recommend most often in the salon.
Moroccan Oil Treatment
The original, the iconic. Moroccan Oil is my number-one recommendation for frizz control, shine, and overall hair health. A few drops on damp hair before styling is all it takes — and it works on every hair type. It also smells absolutely incredible, which doesn’t hurt. This is the product that clients ask me about constantly.
➡️ Shop Moroccan Oil Treatment on Amazon
Redken All Soft Shampoo & Conditioner
For dry, brittle, or color-treated hair, Redken All Soft is the duo I trust most. It’s gentle enough for daily use, sulfate-free formulas are available, and the results are noticeable from the first wash. If she’s dealing with dryness or damage, this is where to start.
➡️ Shop Redken All Soft on Amazon
Matrix Biolage Hydrasource Shampoo & Conditioner
For color-treated hair especially, Biolage Hydrasource keeps moisture locked in between appointments. I recommend this to clients who want to protect their color investment and keep their hair looking freshly done for as long as possible. It’s a staple in my recommendation rotation.
➡️ Shop Matrix Biolage Hydrasource on Amazon
IGK Good Behavior Spirulina Protein Smoothing Spray
IGK is one of my favorite brands for clients who deal with frizz and need a lightweight, no-fuss solution. The Good Behavior spray smooths and protects without weighing hair down — it’s perfect as a heat protectant and everyday finisher. Bonus: the packaging is gorgeous. Very giftable.
➡️ Shop IGK Good Behavior on Amazon
✨ The Little Luxuries That Make a Big Difference
Sometimes the best gifts are the everyday upgrades she’d never buy herself. A few of my favorites:
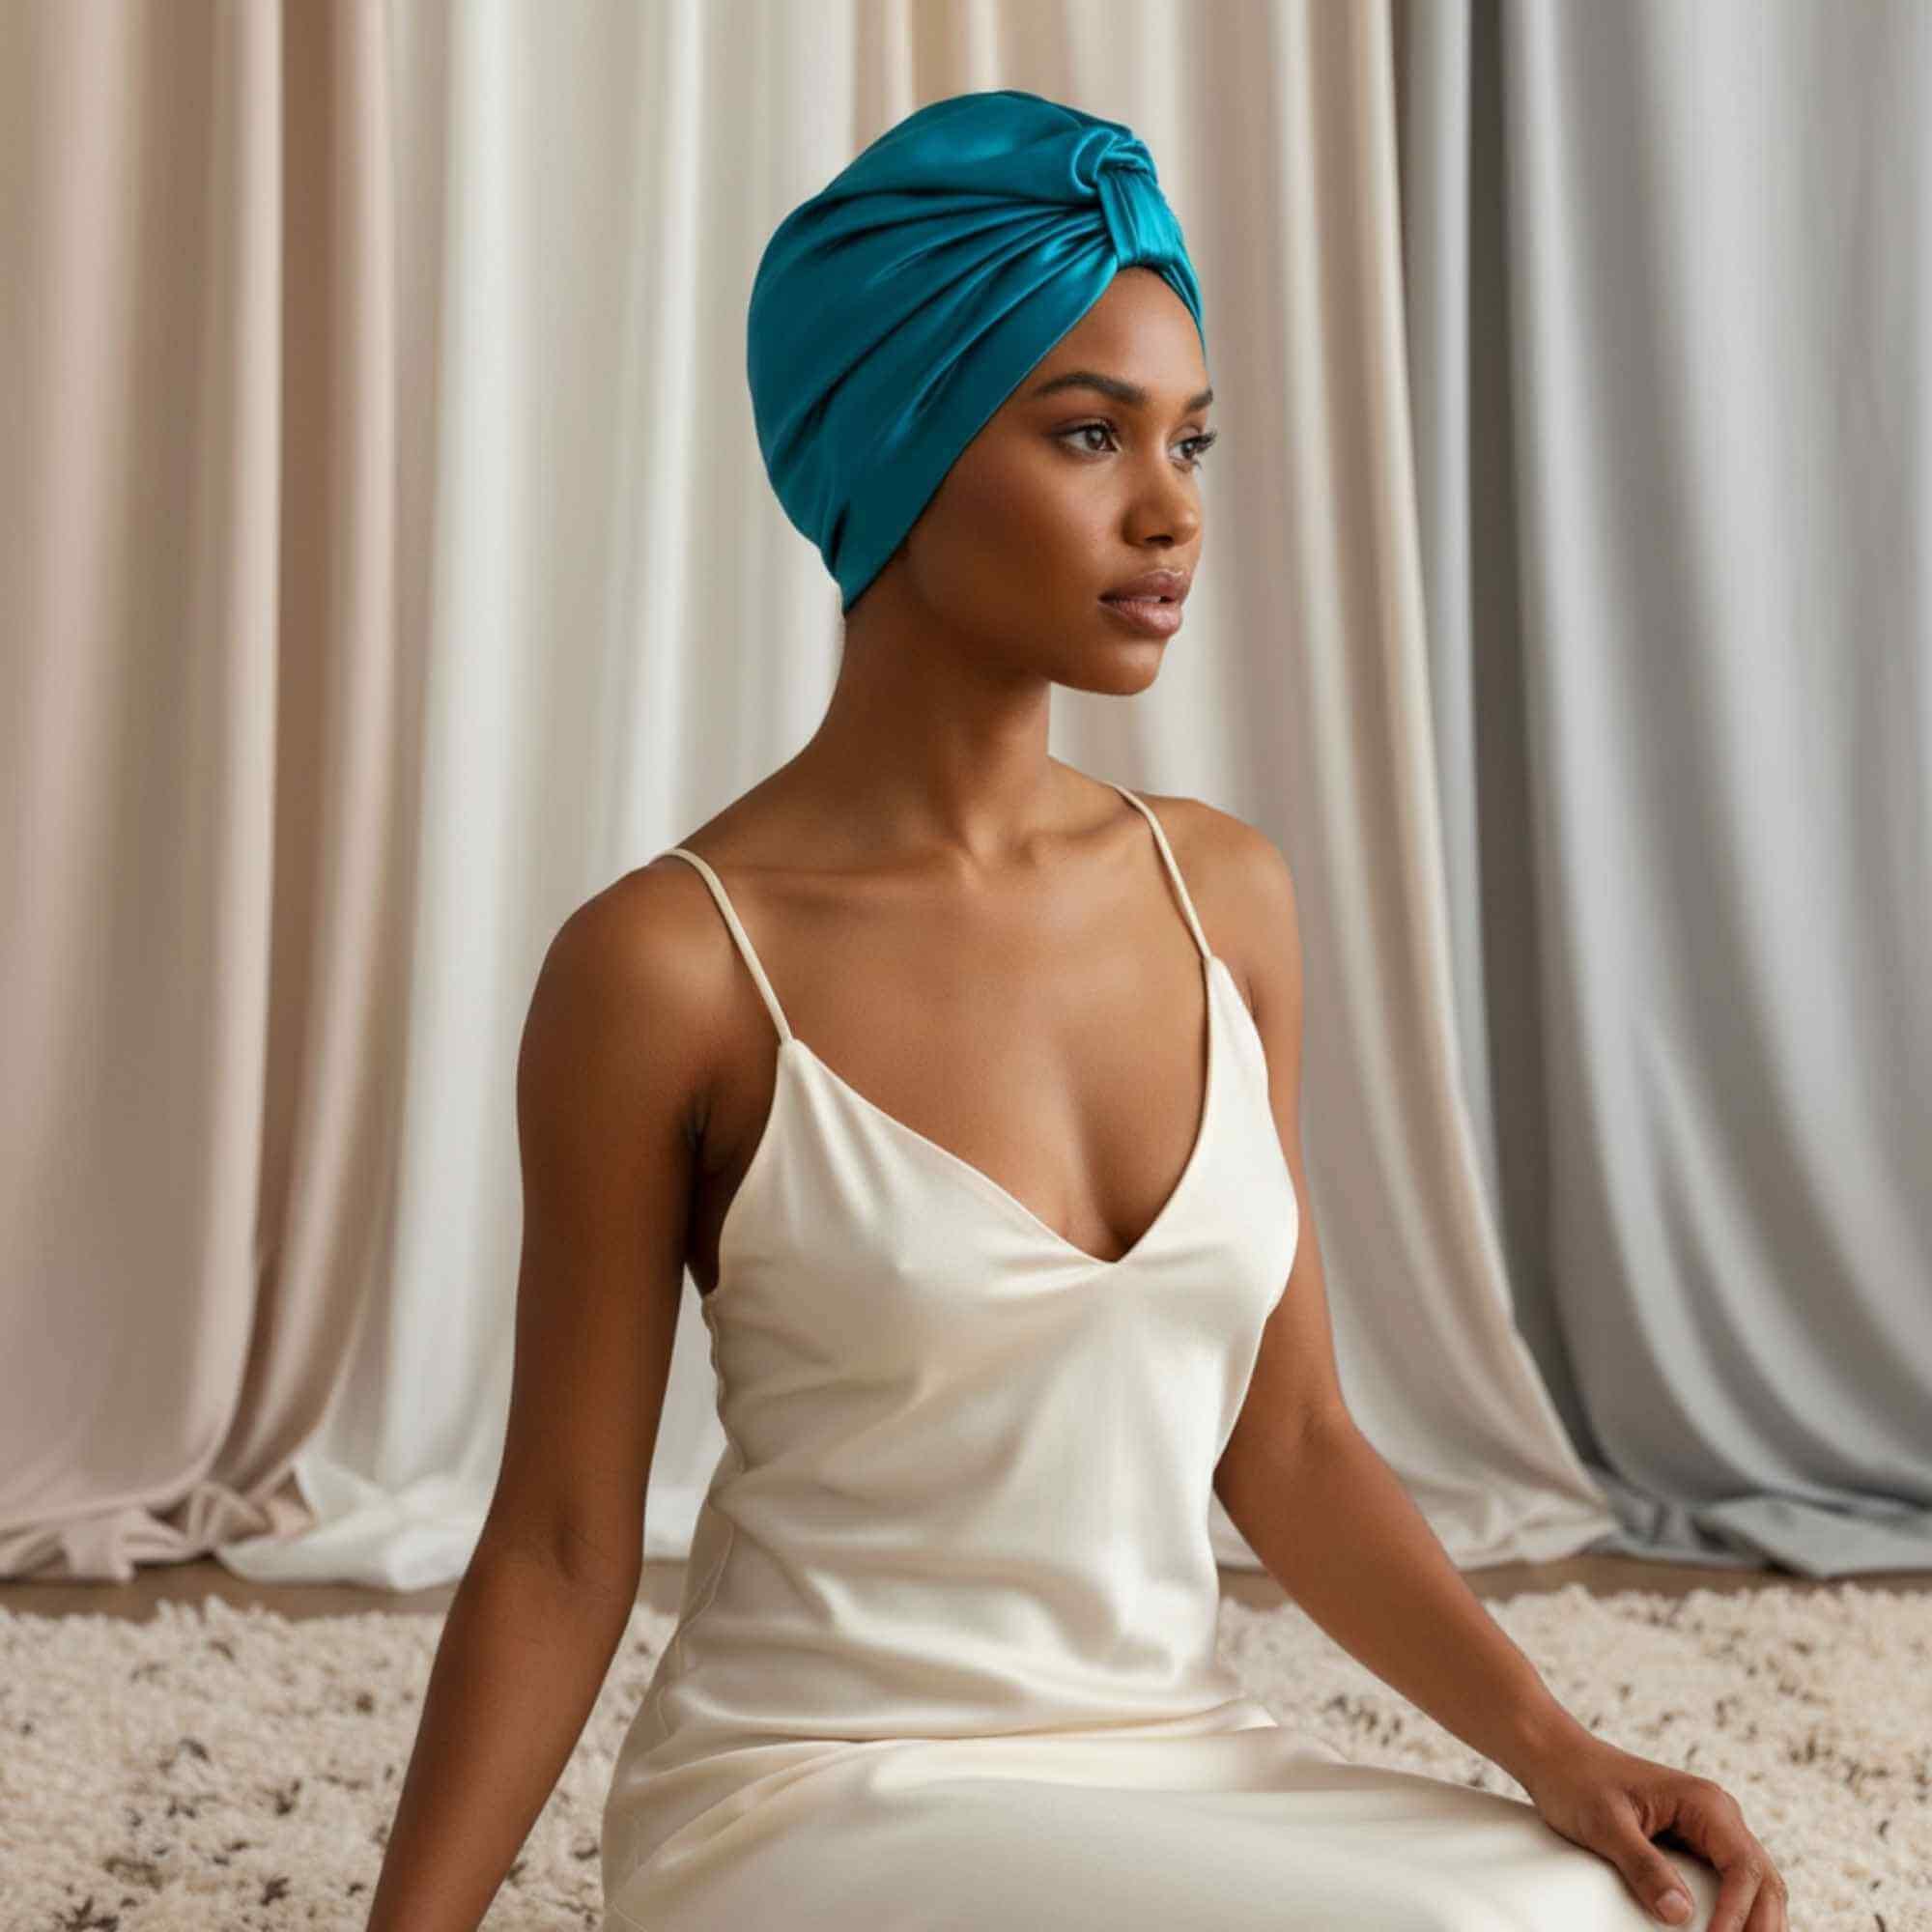
- A satin or silk pillowcase — reduces breakage and frizz overnight; genuinely one of the best things you can do for color-treated or fine hair
- Wide-tooth seamless comb — for detangling wet hair without breakage; sounds simple, makes a huge difference
- Flexi rods or heatless curl set — for the mom who wants curls without heat damage
- A quality hair mask — Redken Extreme Bleach Recovery Cica Cream Mask is exceptional for anyone with lightened hair
➡️ Shop hair accessories and luxury add-ons on Amazon
🎁 How to Build the Perfect Hair Gift Set
Can’t decide? Combine a few items into a custom gift set she’ll actually love. Some combos that work really well together:
- The Everyday Kit: Hot Tools blow dryer + Moroccan Oil + Matrix Biolage shampoo & conditioner
- The Tool Upgrade: Shark FlexStyle + IGK Good Behavior spray + silk pillowcase
- The Curl Girl: Paul Mitchell wand + Moroccan Oil + wide-tooth comb
- The Damage Repair: BaByliss Pro straightener + Redken All Soft duo + hair mask
Put them in a pretty basket and you’ve got a gift that feels curated, thoughtful, and genuinely useful — not another candle she’ll never light.
The Bottom Line
The best gift for a woman who loves her hair is the stuff she uses every single day — elevated. These tools and products are what I recommend in my salon because I know they work. And when she uses them at home, she’s extending the life of her color, protecting her hair between appointments, and honestly just feeling a little more put-together on a random Tuesday.
That’s the real gift.
Want more hair tips, product recommendations, and styling advice? Explore the WannaBee blog for everything you need to know before (and after) your next appointment.
➡️ Read: Hair Girl Code: What Every Salon Client Should Know Before Their Appointment
➡️ Read: From Consultation to Reveal: What a Real Hair Transformation Looks Like
➡️ Book your next appointment with master stylist Jonathon Gerlando at The WannaBee Hair Studio
Why Does Hair Color Fade So Fast? (And What You Can Actually Do About It)
Disclosure: This post contains affiliate links. As an Amazon Associate I earn from qualifying purchases at no extra cost to you.
You just left the salon feeling like a million dollars. The color is perfect — dimensional, fresh, exactly what you wanted. Then three weeks later you’re looking in the mirror wondering where it all went.
I hear this constantly. And the frustrating truth is that most of the time color fading faster than it should is completely preventable. You just need to know what’s actually causing it.
Let me break it down.
🔬 Why Hair Color Fades: What’s Actually Happening
When your hair gets colored the dye molecules are deposited inside the hair shaft. The cuticle — the outermost layer of your hair — needs to stay sealed to keep those molecules locked in. When the cuticle opens color escapes. It’s that simple.
Everything that causes your hair color to fade fast has one thing in common: it’s opening your cuticle, damaging your hair shaft, or both.
⚠️ The Real Reasons Your Color Is Fading Too Fast
1. You’re washing your hair too soon after your appointment
This is one of the most common mistakes I see. After a color service your cuticle needs 48 to 72 hours to fully close and lock the color in. Washing before that window gives those dye molecules an easy exit before they’ve had a chance to set. Wait at least two full days — three is even better.
2. You’re using the wrong shampoo
Sulfates are the biggest color-stripping ingredient in most drugstore shampoos. They’re strong detergents — great at removing dirt, terrible at leaving your color intact. If your shampoo creates a lot of lather and isn’t labeled color-safe or sulfate-free it’s likely pulling color out every single wash.
This is genuinely one of the highest-impact changes you can make at home. Switching to a sulfate-free color-safe shampoo can add weeks to your color’s life.
3. You’re washing too often
Every time water touches your hair some color leaves with it. The more you wash the faster it fades — it’s just math. If you’re washing daily your color doesn’t stand a chance. Aim for two to three times a week and use a dry shampoo between washes to absorb oil and add volume without stripping color.
👉 Not sure how often you should be washing? Read our post How Often Should You Really Wash Color Treated Hair?
4. Hot water is working against you
Hot water opens the hair cuticle — which is the exact opposite of what you want for color retention. This one is an easy fix: finish every wash with a cool or cold water rinse. It takes about ten seconds and makes a real difference in how long your color holds.
5. Heat styling without protection
Flat irons, curling wands, blow dryers — the heat from these tools creates steam inside the hair shaft that literally pushes color molecules out. If you’re using heat tools regularly without a protectant you’re accelerating fading every single time you style.
A good heat protectant is non-negotiable for color treated hair. It’s not just about preventing damage — it’s about keeping your color intact.
👉 Did you know you actually need TWO different heat protectants? Read Why You Actually Need Two Different Heat Protectants to find out why!
6. Sun exposure
UV rays break down the chemical bonds in hair dye the same way they fade fabric left in a window. If you spend a lot of time outdoors your color is taking a hit. A hat is your best friend here but there are also leave-in products with UV filters that help significantly.
7. Your hair’s porosity is working against you
This is the one most people never hear about. Highly porous hair — whether from damage, previous chemical services or just your natural hair structure — absorbs color easily but releases it just as fast. It’s like trying to hold water in a sponge with big holes.
If your color consistently fades faster than it should even when you do everything right porosity is likely the culprit. A good stylist can assess this and recommend treatments that help your hair hold color better before and after your service.
👉 Wondering if your hair is damaged from color services? Read Does Hair Color Actually Damage Your Hair?
💇 Which Colors Fade the Fastest?
Not all color is created equal when it comes to staying power. Here’s the honest breakdown:
Reds and coppers fade the fastest of any professional color. Red pigment molecules are small and unstable — they escape easily and are extremely sensitive to sun, heat and washing. If you love red budget for more frequent gloss refreshes.
Vivid and fashion colors — bold pinks, blues, purples — fade quickly because the pigment molecules sit on the surface of the hair rather than penetrating deeply.
Blondes and highlights don’t fade so much as go brassy as the toner washes out. A regular toning gloss appointment keeps them looking fresh and vibrant.
Brunettes and deeper shades generally have the best color retention — the deeper the color the more stable the pigment.
👉 Not sure which color technique gives you the longest-lasting results between appointments? Read our Balayage vs Highlights — What’s the Difference? post!
🛍️ Products That Actually Help Color Last
These are the categories worth investing in if color longevity matters to you:
- Sulfate-free color-safe shampoo — the single most important product swap you can make
- Color-safe conditioner — keeps the cuticle smooth and sealed
- Purple or blue toning shampoo — essential for blondes and highlighted hair to prevent brassiness
- Heat protectant spray — protects color every time you style with heat
- Weekly deep conditioning mask — especially important for porous or damaged hair
- UV protection leave-in — if you spend significant time outdoors
💖 The Honest Bottom Line
Most color fading is preventable. The right shampoo, less frequent washing, cooler water, heat protection — these things genuinely add weeks to your color’s life without any additional salon visits.
But if you’re doing everything right and still watching your color disappear faster than it should that’s a sign your hair needs some attention before your next service. Porosity issues, damage and buildup can all work against color retention in ways that only a professional assessment can really diagnose.
That’s exactly the kind of thing I look at during a consultation at The WannaBee Hair Studio. Because color that’s applied to hair that’s been properly prepared just lasts longer — full stop.
Ready to make your next color investment actually last? Book a free consultation with Jonathon at The WannaBee Hair Studio in Washington, Michigan. Book Now
Why Does My Hair Look Thinner in Photos? (It’s Probably Not What You Think)
Disclosure: This post contains affiliate links. As an Amazon Associate I earn from qualifying purchases at no extra cost to you.
You looked in the mirror this morning and felt good. Hair looked full, healthy, exactly the way you like it. Then someone tagged you in a photo and the spiral started — is my hair actually thinning?
I hear this almost every single week in my chair. And the answer, most of the time, is the same: your hair is fine. The camera is lying to you.
Here’s what’s actually happening — and how to tell the difference between a bad photo and something genuinely worth paying attention to.
📸 The Short Answer: Cameras and Mirrors Are Not the Same Thing
When you look in the mirror your brain processes depth, dimension, movement and context all at once. A camera collapses all of that into a flat image captured under a single light source in a fraction of a second.
Of course your hair looks different. The tools themselves aren’t comparable.
But there are specific reasons photos skew toward making hair look thinner — and once you understand them that photo becomes a lot less scary.
4 Reasons Your Hair Looks Thinner in Photos
1. Overhead lighting is the biggest culprit
Bathrooms. Restaurants. Outdoor midday sun. When light comes directly from above it shines straight onto your scalp and creates hard contrast between skin and hair. Even a full, healthy head of hair can look sparse under those conditions.
This isn’t hair loss. It’s physics. The same overhead lighting that makes food look flat and unappealing in photos is doing the exact same thing to your scalp.
2. Camera angles always expose your crown
Photos taken from above or slightly downward show your part line and crown more than you’d ever see straight-on in the mirror. And here’s something most people genuinely don’t know — everyone has a naturally thinner-looking area at the crown. It’s completely normal anatomy.
In person movement and angle keep everything blending naturally. A camera freezes one unflattering moment and that’s what you’re left with.
3. Hair density is naturally uneven across your scalp
Hair doesn’t grow at the same thickness everywhere. The crown, part line and hairline are almost always lighter than the sides and back — for virtually everyone. In person this blends seamlessly. Flattened into a photo those variations suddenly jump out in a way they never would face-to-face.
4. Product buildup and oil cause strand separation
When hair gets weighed down — whether from natural oils or product buildup — it starts to clump together instead of staying evenly distributed. That creates small gaps between strands where the scalp shows through.
Hair that’s perfectly healthy reads as thin in a photo because of how it’s sitting, not because of how much there actually is. A good clarifying shampoo used occasionally can make a noticeable difference if buildup is your issue.
👉 Check out our 10 Best Anti-Frizz Products That Actually Work for product recommendations that won’t weigh your hair down.
⚠️ When It Actually Is Worth Paying Attention
I’m not going to tell you it’s always just the lighting — because sometimes it isn’t. These are the signs that separate a bad photo from a real pattern worth addressing:
- Your part is noticeably wider than it was a year or two ago
- You’re shedding more than feels normal, consistently
- Thinning at the temples or crown seems to be progressing month over month
- Your ponytail is measurably smaller than it used to be
One bad photo means nothing. A consistent change over time means something. That difference matters — and it completely changes what you should actually do about it.
💇 What Actually Helps: Fuller-Looking Hair Starting Now
If your concern is mostly visual these are the solutions that genuinely work:
Shift your part. Moving your part even slightly creates immediate volume and coverage in the areas that read thinnest in photos. It’s one of the fastest changes I make with clients and the results are immediate.
Add dimension with color. Strategic highlights and lowlights reduce harsh contrast between your scalp and hair — which is exactly what makes thinning so visible in photos. This is one of the most powerful tools a colorist has for this specific concern. A good balayage or highlight placement can completely transform how your hair photographs.
👉 Not sure which color technique is right for you? Read our Balayage vs Highlights — What’s the Difference? post!
Use a root-lifting product. Lightweight volumizers separate strands and create lift at the scalp without weighing anything down. Keep heavier products on your ends — not your roots.
Rethink your blow-dry technique. Focusing lift at the roots — not just smoothing hair down — creates fullness where it matters most. Technique here makes an enormous difference and it’s something most people have never been specifically shown. Ask your stylist to walk you through it at your next appointment!
Wash more frequently if buildup is a factor. If oil and product are causing separation a more consistent wash schedule makes a visible difference in how your hair sits and photographs.
👉 Not sure how often to wash? Check out our post How Often Should You Really Wash Color Treated Hair?
🛍️ Products That Help Create Fuller Looking Hair
- Lightweight volumizing mousse or spray — adds lift at the roots without weighing hair down
- Clarifying shampoo — removes buildup that causes strand separation
- Dry shampoo — absorbs oil between washes and adds instant volume
- Root lifting spray — targeted lift exactly where you need it most
💖 The Honest Bottom Line
Most people who come to me panicking about a photo leave the consultation understanding that what they’re seeing is lighting, angle and physics — not hair loss. That’s genuinely the most common outcome.
But some of them are catching something real — early enough to actually address it properly. The only way to know which situation you’re in is to have someone actually look at your hair. Not guess based on an iPhone photo taken under bathroom lighting.
If photos have been making you question your hair don’t keep spiraling. Book a consultation and get a real answer instead of an anxiety spiral. That’s what I’m here for.
Have questions about your hair? Book a free consultation with Jonathon at The WannaBee Hair Studio in Washington, Michigan — where every client gets an honest answer and leaves feeling good about their hair. Book Now
From Consultation to Reveal: What a Real Hair Transformation Looks Like
This post contains affiliate links. As an Amazon Associate I earn from qualifying purchases at no extra cost to you.
There’s something almost magical about a great hair transformation. Not the Instagram filter kind — the real kind. The kind where you sit down in the chair feeling like you’ve been playing it safe for too long, and you walk out feeling like the most confident version of yourself.
I’m Jonathon, master stylist at The WannaBee Hair Studio in Washington Township, MI, and I’ve walked a lot of clients through exactly that journey. What I’ve learned is that the transformation itself isn’t just what happens with the color or the cut — it starts the moment you decide you’re ready for a change.
Here’s what the real process looks like, from the very first conversation to the moment you see yourself in the mirror.
✨ Step 1: The Consultation — This Is Where It All Begins
A real transformation starts with a real conversation. Not a quick glance and a nod — an actual sit-down where I get to understand not just what you want your hair to look like, but how you live, how much time you realistically spend on your hair in the morning, and what’s made you feel amazing — or not — about your hair in the past.
This is the most important step and the one most people underestimate.
I’m listening for things like:
- What’s been bothering you about your current hair
- What drew you to the inspiration photos you brought
- What your lifestyle actually allows for in terms of maintenance
- Any history with color, chemical services, or damage
👉 Speaking of preparation — if you haven’t read [Hair Girl Code: What Every Salon Client Should Know Before Their Appointment], that’s a great place to start before your consultation. It’ll set you up for the best possible result.
The consultation isn’t just me gathering information — it’s us building a shared vision. By the end of it, we should both be excited about where we’re going.
🔍 Step 2: The Hair Assessment — What I’m Really Looking At
While we’re talking, I’m also evaluating your hair’s actual condition — and this is where the stylist expertise really comes into play.
I’m assessing:
- Your natural texture and how it behaves
- Your hair’s current health and integrity
- How your hair has responded to previous color or chemical services
- Your natural growth patterns and how they’ll affect the cut
- Your face shape and how different styles will frame it
This isn’t just a formality. What I see during the assessment directly shapes what’s possible — and sometimes what’s possible is even better than what you originally had in mind. A good stylist doesn’t just execute a request, they bring expertise to it.
This is also where honesty about your hair history becomes really important. The more I know going in, the better I can protect your hair and deliver results that last.
📋 Step 3: Building the Plan Together
Once I understand your vision and I’ve assessed your hair, we build the plan — and I mean together. You’re not just sitting there waiting to be told what’s happening. I’ll walk you through exactly what I’m recommending and why.
A real plan includes:
- The specific services we’re doing and in what order
- A realistic timeline for the appointment
- What the result will look like and how it’ll grow out
- A maintenance plan so you know what to expect going forward
- Product recommendations to protect your investment at home
👉 If color is part of your transformation, my post on [balayage vs. highlights] breaks down two of the most popular options so you can come in with a clearer sense of direction.
This is also the moment to ask every question you have. No question is too basic. Understanding what’s happening to your hair and why is part of the experience at WannaBee — not an interruption to it.
💇♀️ Step 4: The Service — Where the Magic Happens
This is the part people think is the whole story — but by the time we get here, so much of the work has already been done in the consultation and planning stages. That groundwork is what makes this part look effortless.
Depending on your transformation, this might involve:
- A precision cut that completely reframes your face
- A color service like balayage, highlights, or a full color change
- A toning or gloss treatment to dial in the exact shade
- A bond-building treatment to protect your hair’s integrity throughout
What makes the WannaBee experience different is that it’s just you and me, start to finish. No handoffs, no assistants, no wondering who’s going to come back and check on your color. I’m with you through every single step — which means I can adjust, refine, and respond to what your hair is doing in real time.
Great transformations aren’t just executed — they’re read as they happen.
🪞 Step 5: The Style and Reveal
This is the moment. And I genuinely love this part every single time.
Once the cut and color are complete, I style your hair the way it’s meant to be worn — not just blown out and sent on your way, but actually styled so you can see the full vision realized. This is also when I show you exactly how to recreate the look at home, which products to use, and how to work with your natural texture.
A few tools I love for achieving a salon-quality finish at home:
For a sleek, polished look, the BaByliss Pro Nano Titanium Straightener delivers consistent heat without damaging your hair’s integrity. For effortless waves, the Paul Mitchell Express Ion Unclipped Curling Wand gives you that lived-in texture that’s so hard to fake. And for a beautiful blowout, the Hot Tools Pro Artist 1875W Blow Dryer is a game changer — the speed and control make all the difference.
👉 Want to protect that transformation while you sleep? Check out my post on [protecting your hair while sleeping] — small habits that make a big difference in how long your results last.
🏠 Step 6: Maintaining the Transformation at Home
A great transformation deserves to be maintained — and that starts the moment you walk out the door. Before you leave, I’ll make sure you know exactly what your hair needs to stay healthy, vibrant, and true to the vision we created together.
The basics of transformation maintenance:
- Use color-safe, sulfate-free shampoo and conditioner
- Deep condition regularly to maintain moisture and integrity
- Protect your hair from heat with a quality heat protectant
- Schedule your next appointment before you leave so you don’t lose the shape
👉 My post on [washing color-treated hair] covers everything you need to know about keeping your color fresh and vibrant between appointments.
For color-treated hair, I always recommend Redken Color Extend Magnetics or Matrix Biolage ColorLast — both are gentle enough to preserve your color while keeping your hair healthy and shiny between appointments.
💫 What a Real Transformation Actually Feels Like
Here’s what I want every client to know: a real hair transformation isn’t just about the way you look walking out. It’s about the way you carry yourself. The way you feel when you catch your reflection. The way you can’t stop touching your hair on the drive home.
That’s what we’re building toward — every consultation, every assessment, every carefully executed service. Not just a great hair day, but a version of yourself you’re genuinely excited about.
That’s the WannaBee experience. And it starts with a single appointment.
📅 Ready for Your Transformation?
Whether you’ve been thinking about a change for months or you woke up this morning ready to do something different — I’m here for it.
I work with clients from Washington Township, Romeo, Shelby Township, Rochester Hills, Rochester, and all across Macomb County who are ready to stop playing it safe with their hair.
👉 Book your transformation appointment at The WannaBee Hair Studio and let’s build something you’ll love.
Hair Girl Code: What Every Salon Client Should Know Before Their Appointment
This post contains affiliate links. As an Amazon Associate I earn from qualifying purchases at no extra cost to you.
There’s an unwritten code in the salon world — things every stylist knows but rarely comes out and says. Call it professional courtesy, call it not wanting to make anyone feel bad. But honestly? You deserve to know. Here’s the Hair Girl Code you need for your next salon visit.
I’m Jonathon, master stylist at The WannaBee Hair Studio in Washington Township, MI, and I’m breaking the seal. Whether you just booked your very first balayage or you’ve been a salon regular for years, these are the insider things that actually make a difference in what you walk out with. Consider this your cheat sheet.
🤫 1. Fresh-Washed Hair Isn’t the Compliment You Think It Is
You want to show up looking put-together. Totally get it. But washing your hair right before a color appointment can actually work against you — and here’s the science behind why.
When you wash your hair, you strip away your scalp’s natural acid mantle — a thin protective barrier that keeps your scalp balanced and less reactive to color and chemical services. Washing also temporarily opens the hair cuticle, which can make your scalp more sensitive. Your natural oils? They’re not gross — they’re actually protecting you, improving color adherence, and reducing irritation.
The move: Wash your hair the day before, not the morning of. Your stylist will quietly thank you.
✂️ 2. Put the Scissors Down. Seriously.
You notice something slightly off about your hair the night before your appointment. The temptation to just quickly fix it is real. Don’t.
Trimming your own bangs, grabbing a box dye, or trying to “even things out” at home almost always creates more problems than it solves — and can seriously limit what your stylist can do when you come in. Even a small at-home color change can throw off the entire result, sometimes in ways that are expensive and time-consuming to correct.
The move: Come in exactly as-is. A good stylist can work with real hair. Undoing a home experiment is a whole different situation.
👉 If you’re dealing with something that feels urgent — brassiness, damage, an uneven DIY attempt — check out my post on [color-treated hair care] before reaching for that box dye. A quick consultation is always the better first step.
🧴 3. Lay Off the Products for a Day or Two
Dry shampoo, oils, styling creams, hairspray — we see it all. A little product is completely fine. But heavy buildup makes it harder to assess your hair’s true texture and condition, and it can interfere with both color absorption and cutting precision.
Your stylist is trying to see your hair — not a layer of product on top of it.
The move: Keep it light in the day or two before your appointment. Your hair doesn’t need to be perfect — just not buried.
📱 4. Bring Inspo — But Make It Curated, Not Chaotic
No vision at all makes consultations longer and less precise. But showing up with 20 screenshots of completely different vibes? That’s its own kind of challenge.
The goal is clarity. Your stylist is trying to understand the feeling you’re going for, and conflicting images pull in too many directions at once.
The move: Save 2–3 photos that genuinely represent what you love. Think of it like a mood board, not a Pinterest dump. Your stylist will take it from there and find the version that actually works for your hair, face shape, and lifestyle.
👉 Not sure what direction to take for color? My post on [balayage vs. highlights] breaks it all down — great starting point before your consultation.
👕 5. Your Outfit Actually Matters More Than You Think
Here’s a pro secret most clients don’t know: bulky hoodies, turtlenecks, and thick collars can physically tilt your head forward during a cut — and that shift in your posture can throw off the baseline of your haircut. That’s how you end up with a bob that looks uneven in the back when you get home.
Beyond that, thick necklines just get in the way during color services and styling.
The move: Wear something with an open or lower neckline — a relaxed crewneck, a button-down you can slip off, anything that keeps your neck accessible and your posture natural.
⏰ 6. Give Yourself the Gift of Time
Balayage. Color correction. Extensions. These are not rush jobs, and no good stylist will treat them like one. If you’re mentally racing to your next obligation, it creates pressure that affects the entire experience — and honestly, the result.
High-quality hair is never rushed.
The move: Build your appointment into a real block of time and treat it like the self-care it actually is. You booked this for a reason — enjoy it.
💬 7. Your Hair History Is a Judgment-Free Zone
This is the big one. Tell your stylist everything — box dye, previous color treatments, chemical services, heat damage, medications, the drugstore toner you tried last month. All of it.
I promise there is zero judgment in that chair. But what I don’t know can genuinely limit what I can safely do for your hair. The more honest you are, the better I can protect your hair and actually deliver what you’re envisioning.
The move: Spill it. Your stylist is on your team.
✨ The Hair Girl Code Cheat Sheet
✔ Wash your hair the day before — not the morning of
✔ No last-minute DIY fixes, no matter how tempting
✔ Go light on product for a day or two before
✔ Bring 2–3 curated inspo photos
✔ Skip the hoodie — wear an open neckline
✔ Book yourself enough time to actually enjoy it
✔ Be honest about your hair history — every bit of it
💇♀️ This Is What the WannaBee Experience Is Built On
At The WannaBee Hair Studio in Washington Township, MI, every appointment is one-on-one with me from start to finish. No front desk shuffle, no handoff, no guessing game about who you’ll get. Just a stylist who actually knows your hair — and wants to keep it that way.
I work with clients from Washington Township, Romeo, Shelby Township, Rochester Hills, Rochester, and the surrounding areas who are done settling for inconsistent results and ready for a stylist they can actually trust.
📅 Ready to Get In the Chair?
Now that you’ve got the code — use it. Your hair will thank you.
👉 Book your appointment at The WannaBee Hair Studio and experience what a real one-on-one salon appointment feels like.
Is Your Hair Jewelry or “Clean Girl” Aesthetic Hurting Your Hair?
FTC Disclosure: This post contains affiliate links. If you purchase through these links, I may earn a small commission at no extra cost to you.
The Clean Girl aesthetic is everywhere right now — slicked-back buns, minimalist gold hoops, delicate hair clips, and that effortlessly “undone” look that somehow took three hours to perfect. And while it’s undeniably chic, some of the accessories making that look happen could be doing a number on your hair.
Before you reach for that cute claw clip or stack those butterfly clips, let’s talk about what’s actually going on behind the scenes — and how to get the look without the damage.
The Problem with Common Hair Accessories
Not all accessories are created equal, and some of the most popular ones are low-key hair wreckers.
Metal clips and bobby pins seem harmless, but the rough edges on cheap versions snag and break hair strands over time. If your bobby pins leave a little crease or pull when you remove them, that’s damage happening in slow motion.
Tight elastics — especially the ones with metal crimps — are one of the biggest culprits for breakage, particularly right at the hairline. That “hair tie dent” you get after a ponytail? That’s compression stress. Do it every day and you’ll start to notice thinning right where the elastic sits.
Headbands (especially thick, rigid ones) create friction along the hairline, which over time can lead to traction-related thinning — a very real condition called traction alopecia. This is especially common for people who wear tight styles repeatedly.
Heavy hair jewelry puts physical weight and stress on individual strands, which can cause breakage at the attachment point. The more strands carrying the weight, the less the risk — but dainty, strand-specific charms are the most damaging.
How Different Hair Types Are Affected
Fine or thin hair is the most vulnerable. The strands have less structural mass to begin with, so breakage is more visible and less forgiving. Tight elastics and metal clips are especially risky.
Curly and coily hair tends to be naturally drier and more prone to breakage at points of tension. Anything that creates friction or pulls at the curl pattern — including rough-textured accessories — can cause frizz and structural damage.
Color-treated hair has a compromised cuticle layer, making it more porous and fragile. Heat from styling plus rough accessories is a double hit — the hair is already weakened and less able to handle stress.
Thick or coarse hair is more resilient, but it’s also heavier — which means you’re often reaching for tighter, stronger holds. The damage can be more gradual, but it’s still there.
What to Use Instead
The good news? There are accessories specifically designed to hold your hair without wrecking it.
Silk or satin scrunchies have become iconic for a reason — the smooth surface creates almost no friction, which means less breakage and frizz. They’re a clean, elegant swap for traditional elastics and they look great.
Claw clips (the right kind) are actually a solid option when used correctly. Opt for smooth-edged versions that distribute weight across a larger section of hair rather than pinching a few strands. The oversized claw clip trend is genuinely good for your hair.
Spiral hair ties grip without creasing — they’re a game-changer for people who wear their hair up constantly and don’t want the damage of a traditional elastic.
Soft headbands made from fabric or velvet reduce friction compared to rigid plastic or metal options, especially around the hairline.
Seamless elastics (no metal crimp) are a simple upgrade that makes a real difference if you’re a daily ponytail person.
Clean Girl Done Right
The Clean Girl aesthetic hair doesn’t have to come at a cost. A sleek bun with a silk scrunchie, an oversized claw clip with a few face-framing pieces, a soft fabric headband — these all nail the look without the long-term consequences.
The key is paying attention to how an accessory interacts with your hair. Is it pulling? Creasing? Snagging when you remove it? Those are your red flags.
And if you’re already noticing breakage, thinning at the hairline, or more texture and frizz than usual, it may be time to take a closer look at your daily accessories — and book a visit with your stylist to assess the damage and get a plan.
Take Care of Your Hair IRL
If your hair has been going through it lately — whether it’s accessory damage, color stress, or just general dullness — sometimes what it really needs is a professional eye and a fresh start. Jonathon at The WannaBee Hair Studio specializes in personalized care that actually addresses your hair’s needs, not a one-size-fits-all approach. Book your appointment on Vagaro and let’s give your hair what it’s been missing.
Summer Hair SOS: How to Protect Your Color and Hair Health This Season
Summer is my favorite time of year. The warmth, the energy, the way everyone seems to walk in wanting something fresh and fun. But I’ll be honest with you — summer is also one of the hardest seasons on your hair. Between the sun beating down, jumping in the pool, and that Michigan humidity that seems to have a personal grudge against a good blowout, your hair takes a beating from June through August.
The good news? A little preparation goes a long way. Here’s what I tell my clients every spring before the season hits.
1. The Sun Is Not Your Hair’s Friend
My first tip is one of the easiest — wear a sun hat when you can. It’s the simplest form of UV protection for your hair and your scalp, and honestly, a great hat is a whole summer look on its own. Beyond that, use a UV protectant spray on your hair just like you’d apply sunscreen to your skin.
I also recommend switching to a UV protecting shampoo during the summer months. It’s an easy swap that adds a layer of defense every single time you wash your hair without any extra steps in your routine.
A great product to try is the Kenra Platinum Silkening Mist — it protects against UV damage while adding shine and smoothness. Another solid choice is IGK Heat & UV Protecting Spray which gives you heat protection and UV defense in one step.
2. Chlorine Is Brutal — Here’s How to Fight Back
If you’re a swimmer or you spend time in the pool with your kids or grandkids, chlorine is something you need to take seriously. It strips moisture from your hair, causes color to fade unevenly, and over time can leave hair feeling dry, brittle, and rough. If you have lighter colored or blonde hair, chlorine can even cause an unwanted green tint.
Here’s my game plan for pool season:
- Wet your hair with clean water before you get in the pool. This is one of my most important tips. Hair is like a sponge — if it’s already saturated with clean water, it absorbs significantly less chlorinated water and blocks out a lot of that chemical pollution before it can do damage.
- Use a swim cap when you can, especially if you’re doing laps regularly.
- Rinse your hair immediately after getting out of the pool. Don’t let chlorine sit.
- Use a clarifying shampoo once a week during swim season to remove buildup.
For targeted protection, I love UltraSwim Chlorine Removal Shampoo — it’s specifically formulated to remove chlorine and restore moisture. It’s affordable, effective, and a summer staple.
3. Humidity and Frizz — The Michigan Summer Struggle superior peace of mind
Anyone who lives here knows exactly what I’m talking about. You leave the house looking great and arrive somewhere looking like a completely different person. Humidity causes the hair shaft to swell and absorb moisture from the air unevenly, which is what creates frizz.
The key to fighting humidity isn’t fighting moisture — it’s sealing it out before it gets in.
- Apply an anti-humidity product while your hair is still damp, before styling
- Don’t over-touch your hair while it’s drying — the more you handle it, the more frizz you create
- A lightweight serum or cream on the ends helps seal the cuticle
My top recommendation here is Color Wow Dream Coat Supernatural Spray — we’ve talked about this one before and for good reason. It creates a protective coating over the hair shaft that literally repels humidity. It’s a game changer for Michigan summers. Apply it before you blow dry and you’ll be amazed at the difference.
4. Summer Is Actually a Great Time to Go Lighter
Here’s something I love telling my clients — if you’ve been thinking about going lighter, summer is the perfect time to do it. The sun naturally lightens hair, which means it works with your color service rather than against it. You get a more natural, sun-kissed result and your color tends to blend and grow out more beautifully. Come in and let’s talk about what going lighter could look like for you this season.
A Few Final Tips Before Summer Hits
Come in for a trim before summer gets into full swing. Removing split ends means your hair starts the season strong and is less vulnerable to damage. We can also talk about a deep conditioning treatment to build up your hair’s moisture reserves before the heat and sun start working against you.
Summer should be fun — and your hair should be too. A little prep now means you spend less time fighting your hair and more time enjoying the season.
See you soon! — Jonathon
How Often to Wash Color Treated Hair
How Often Should You Really Wash Color Treated Hair?
Disclosure: This post contains affiliate links. As an Amazon Associate I earn from qualifying purchases at no extra cost to you.
You just left the salon with fresh, beautiful color. It’s vibrant, shiny and exactly what you wanted. And then a few days later you’re standing in the shower wondering — is it okay to wash it yet? Will shampooing ruin everything? How often should I wash color treated hair?
It’s one of the most common questions color treated clients ask. And the answer might surprise you.
🚿 The Short Answer
Wash your hair less than you think you need to. Most people overwash their hair — and when your hair is color treated, overwashing is one of the fastest ways to fade your color and dry out your strands.
For most color treated hair, washing 2 to 3 times per week is the sweet spot.
But let’s break it down a little more because everyone’s hair is different.
💧 Why Washing Too Often Fades Your Color
Every time you shampoo your hair, you’re opening the hair cuticle. For color treated hair this is a big deal because an open cuticle means color molecules can escape. The more you wash, the more color you lose — and the faster your vibrant salon color turns dull and brassy.
Hot water makes this even worse. Hot water opens the cuticle even further, accelerating color fade significantly.
The fix?
- Wash less frequently
- Use lukewarm or cool water when you do wash
- Finish with a cool water rinse to seal the cuticle and lock in color
📅 How Often Should YOU Wash Based on Your Hair Type?
Fine or oily hair: Your scalp produces more oil so you may feel like you need to wash more often. Try stretching to every other day first and use a dry shampoo on in-between days to absorb oil and add volume without stripping your color.
Medium or normal hair: 2 to 3 times per week is perfect. Your hair can handle a little more time between washes without looking or feeling dirty.
Thick or dry hair: You can comfortably go 3 to 4 days between washes — maybe even longer! Thick and dry hair holds onto oils longer and actually benefits from the natural moisture that builds up between washes.
Curly or coily hair: Once a week or even less is perfectly fine for curly hair. Curly hair tends to be naturally drier and needs those natural oils to stay moisturized and defined.
🧴 The Products You Use Matter Just as Much
Washing less is only half the equation. WHAT you wash with makes a huge difference in how long your color lasts.
Always use:
- ✅ Color-safe shampoo — regular shampoos can be too harsh for color treated hair and strip color fast
- ✅ Sulfate-free formula — sulfates are the main culprit for color fade
- ✅ Color-safe conditioner — helps seal the cuticle and lock in moisture after every wash
- ✅ Weekly deep conditioning treatment — color treated hair needs extra moisture to stay healthy and vibrant
Avoid:
- ❌ Clarifying shampoos on color treated hair — save these for occasional use only
- ❌ Hot water — always finish with cool water
- ❌ Rough towel drying — pat gently instead of rubbing
- ❌ Heat styling without a heat protectant — color treated hair needs protection from heat damage
🌟 The Dry Shampoo Game Changer
If you’re used to washing your hair every day the transition to washing less can feel weird at first. Your scalp may actually overproduce oil initially — but give it 2 to 3 weeks and it will regulate itself.
In the meantime dry shampoo is your best friend. A good dry shampoo:
- Absorbs excess oil at the roots
- Adds volume and texture
- Extends your blowout
- Keeps your color looking fresh between washes
Spray it at the roots, let it sit for a minute, then work it through with your fingers or a brush. Game changer. 🙌
⏰ What About Right After Getting Your Color Done?
This one is important. After a fresh color service wait at least 48 to 72 hours before washing your hair. This gives the color molecules time to fully settle into the hair shaft and oxidize properly.
Washing too soon after coloring is one of the biggest mistakes people make — and it can significantly shorten how long your color lasts.
Pro tip: If you absolutely must wash sooner use only cool water and skip the shampoo — just rinse and condition.
💖 Final Thoughts
The golden rules for washing color treated hair:
- 🚿 Wash 2-3 times per week — less is more
- 💧 Use cool or lukewarm water — hot water fades color fast
- 🧴 Always use color-safe, sulfate-free products
- ⏰ Wait 48-72 hours after coloring before your first wash
- 🌟 Dry shampoo is your best friend between washes
- 💆 Deep condition weekly to keep color treated hair healthy and vibrant
Your color is an investment — treat it like one! And when in doubt, ask your stylist. They know your hair better than anyone.
Want personalized advice on caring for your color treated hair? Book an appointment with Jonathon at The WannaBee Hair Studio — where every client leaves with healthy, beautiful, vibrant hair. Book Now
Balayage vs Highlights
Balayage vs Highlights — What’s the Difference and Which One Is Right for You?
Disclosure: This post contains affiliate links. As an Amazon Associate I earn from qualifying purchases at no extra cost to you.
If you’ve ever sat in a salon chair and nodded along while your stylist talked about balayage and highlights — not totally sure which was which — you’re not alone. It’s one of the most common questions I get asked, and honestly, the confusion makes sense. Both techniques lighten your hair. Both can give you that sun-kissed, dimensional look. But they are not the same thing, and choosing the wrong one for your hair type and lifestyle can mean the difference between loving your hair and spending the next six months growing it out.
Let’s clear it up once and for all.
✨ What Are Highlights?
Traditional highlights use foils to isolate sections of hair and apply lightener directly. The foils wrap around each section and create a controlled environment where the lightener can do its thing without bleeding into the surrounding hair.
The result? Precise, uniform streaks of lightness that run from root to tip. Highlights are consistent, structured and very deliberate. They give you a clean, polished look with obvious contrast between your natural color and the lightened sections.
Highlights are great for:
- Adding brightness and dimension
- Covering gray hair
- Achieving a bold contrast look
- People who want consistent, predictable results
🌿 What Is Balayage?
Balayage — pronounced bah-lee-AHZH — is a French word that means “to sweep.” And that’s exactly what it is. Instead of foils, your stylist hand-paints lightener directly onto the hair in a sweeping motion. The lightener is applied more heavily at the ends and more softly at the roots, mimicking the way the sun naturally lightens hair.
The result is soft, blended, natural-looking color that grows out beautifully without harsh lines.
Balayage is great for:
- A natural, sun-kissed look
- Low maintenance color
- Soft, seamless grow-out
- People who don’t want to be in the salon every 6 weeks
🔍 Key Differences at a Glance
| Highlights | Balayage | |
|---|---|---|
| Technique | Foils | Hand painted |
| Look | Uniform, structured | Soft, natural |
| Maintenance | Every 6-8 weeks | Every 3-4 months |
| Grow out | Visible root line | Seamless and soft |
| Best for | Bold contrast, gray coverage | Natural, low maintenance |
| Processing time | Longer | Shorter |
💡 Which One Lasts Longer?
Balayage wins here — hands down. Because the lightener is painted away from the root, you don’t get that harsh regrowth line that highlights can create. Most balayage clients come back every 3 to 4 months, sometimes even longer. Highlights typically need a touch up every 6 to 8 weeks to keep them looking fresh.
If you’re someone who hates being tied to the salon chair on a strict schedule, balayage is going to be your best friend.
💰 Which One Costs More?
This depends on the salon and the stylist, but generally balayage requires more skill and artistry — it’s literally painted freehand — so it can run slightly higher than traditional highlights. However when you factor in that balayage needs touch ups far less frequently, many clients actually save money in the long run.
🎨 Can You Combine Both?
Absolutely — and honestly, many of the most beautiful color results come from combining techniques. A stylist might use foils at the root area for brightness and hand paint balayage through the mid-lengths and ends for a soft, blended finish. This is sometimes called a “hybrid” color service and it gives you the best of both worlds.
🌟 Which One Is Right for You?
Here’s a simple way to think about it:
Choose highlights if you:
- Want bold, noticeable color contrast
- Need gray coverage from the root
- Don’t mind coming in every 6-8 weeks
- Love a polished, structured look
Choose balayage if you:
- Want a natural, effortless look
- Prefer low maintenance color
- Love the sun-kissed, lived-in vibe
- Want a longer time between appointments
Not sure? That’s exactly what a color consultation is for! Every head of hair is different and what works beautifully on one person might not be the right choice for another. A good colorist will look at your hair type, texture, natural color and lifestyle before making a recommendation.
🛍️ At-Home Color Care Products Worth Trying
Whether you have highlights or balayage, color treated hair needs extra love between appointments. Here are some products that can help keep your color looking fresh and your hair feeling healthy:
- Purple shampoo — essential for blondes and highlighted hair to keep brassiness at bay
- Color-safe deep conditioner — replenishes moisture that color services can strip away
- Hair gloss treatment — adds shine and extends the life of your color
- Leave-in conditioner — keeps color treated hair hydrated and frizz-free
👉 For more product recommendations check out our 10 Best Anti-Frizz Products That Actually Work
💖 Final Thoughts
Balayage and highlights are both beautiful techniques — they just serve different purposes and suit different lifestyles. The most important thing is finding a colorist you trust who will take the time to understand what you actually want and what will work best for YOUR hair.
Have questions about which color technique is right for you? Book a color consultation with Jonathon at The WannaBee Hair Studio — it’s completely free and there’s no obligation. He’ll walk you through your options and help you find your perfect look. Book Now
Why You Actually Need Two Different Heat Protectants for Hair (Yes, Really)
Disclosure: This post contains affiliate links. If you purchase through one of my links, I may earn a small commission at no extra cost to you.
Okay, real talk. If you’ve been grabbing the same heat protectant spray for your blowout
AND your flat iron or curling iron — you’re not alone. Most people do it. But here’s the
thing your hair has been trying to tell you: those two situations are not the same, and
your protectant shouldn’t be either. You need two different heat protectants to care for your hair.
Let’s break it down.
When You’re Blow Drying
When you blow dry, you’re working with wet or damp hair. Your hair is in its most
vulnerable state — the cuticle is open, moisture is already starting to escape, and you’re
about to hit it with a continuous blast of heat for several minutes. What you need is a
product specifically designed to be applied to damp hair, one that helps lock in
moisture, smooth the cuticle, and protect against that sustained, lower-level heat.
A fan favorite for this? The Kenra Platinum Blow-Dry Mist. It’s ultra-lightweight,
detangles like a dream, and is designed specifically for the blow-dry process. Your hair
will feel noticeably softer and smoother when you’re done — and it speeds up drying
time too. Win-win.
Another great option is the Color Wow Dream Coat Supernatural Spray — a heat-
activated formula that creates a protective barrier while you blow dry, and is especially
great if humidity and frizz are your nemesis. (It really does last through multiple
shampoos.)
When You’re Curling or Flat Ironing
Now here’s where it changes. Flat irons and curling irons hit much higher temperatures — we’re talking 350°F to 450°F — and they’re applied directly to dry hair
in short, intense bursts. Using a product meant for wet hair at this stage? It can actually
cause damage instead of preventing it.
For irons and wands, you need something with a higher heat tolerance that’s formulated
for dry hair application.
Enter the CHI 44 Iron Guard Thermal Protection Spray. It’s a salon staple for good
reason — ceramic minerals and proteins create a solid barrier between your hair and that
intense direct heat, while keeping frizz in check and adding shine. Spray it on dry hair
right before you style.
If you want something a little more luxurious, Olaplex No. 9 Bond Protector
Nourishing Hair Serum is worth every penny. It protects up to 450°F, works on both
damp and dry hair, and actually nourishes your hair while protecting it. Your stylist will
notice the difference — in a good way.
The Bottom Line
Think of it like this: you wouldn’t wear a raincoat to go snowboarding, right? Same logic
applies. Give your hair what it actually needs for each step of the styling process.
Blow drying → lightweight, damp-hair formula
Curling or flat ironing → high-heat, dry-hair formula
Your hair will thank you. And honestly? So will your stylist.
Have questions about what heat protectant is right for your hair type? Book a
consultation with Jonathon at The WannaBee Hair Studio — he’s got you covered.
How to Protect Your Hair While You Sleep (Simple Overnight Hair Care Guide)
This post contains affiliate links. As an Amazon Associate I earn from qualifying purchases at no extra cost to you.
🛏️ How to Protect Your Hair While You Sleep (Simple Overnight Hair Care Guide)
Believe it or not, a lot of hair damage happens while you sleep. Tossing and turning on a rough pillowcase, sleeping with your hair down, or going to bed with wet hair can all lead to breakage, frizz, and tangles by morning.
The good news? A few simple changes to your nighttime routine can make a huge difference in the health and appearance of your hair.
If you’ve been wondering how to protect your hair while you sleep, this guide will walk you through everything you need to know.
🌙 Why Your Nighttime Routine Matters
While you sleep your hair rubs against your pillowcase for 6-8 hours every night. Over time this friction causes:
- Breakage and split ends
- Frizz and flyaways
- Tangles and knots
- Color fading
The right nighttime habits can dramatically reduce all of these issues.
🛏️ Step 1: Switch to a Silk or Satin Pillowcase
This is the single easiest change you can make for your hair.
Why it works:
- Silk and satin create less friction than cotton
- Helps prevent breakage and split ends
- Reduces frizz and flyaways overnight
- Also great for your skin!
👉 Looking for the best silk pillowcase? Check out our recommendations in 10 Best Anti-Frizz Products That Actually Work
💆 Step 2: Sleep with Your Hair in a Loose Bun or Braid
Leaving your hair completely loose while you sleep means more tangling and friction.
What to do:
- Tie your hair in a loose bun on top of your head
- Or try a loose braid down your back
- Use a soft scrunchie — never a tight elastic!
This keeps your hair contained and reduces friction while you sleep.
🧴 Step 3: Apply an Overnight Hair Mask or Oil
Nighttime is the perfect time to deeply nourish your hair while you sleep.
Best overnight treatments:
- Argan oil — smooths and adds shine
- Coconut oil — deeply moisturizes
- Overnight hair mask — repairs damage while you sleep
How to use:
- Apply a small amount to the ends of your hair
- Avoid the roots to prevent greasiness
- Tie hair up loosely before bed
👉 For more frizz fighting products see our 10 Best Anti-Frizz Products
🚿 Step 4: Never Go to Bed with Wet Hair
Wet hair is extremely fragile and prone to breakage. Sleeping on wet hair can cause:
- Significant breakage
- Frizz and tangles
- Mildew smell on your pillow
- Scalp issues
Always make sure your hair is completely dry before bed. If you shower at night try to shower earlier to give your hair time to dry naturally.
🎀 Step 5: Use a Silk Hair Bonnet or Wrap
For extra protection especially for curly, coily or color treated hair:
- A silk hair bonnet keeps your style intact overnight
- A silk hair wrap protects your ends from friction
- Both are great for maintaining blowouts and styles longer
☀️ Step 6: Start Your Morning Right
How you handle your hair in the morning matters too:
- Use a wide tooth comb to gently detangle — never a brush on dry tangled hair
- Start detangling from the ends and work your way up
- Apply a light leave-in conditioner if needed
- For frizz tips check out How to Get Rid of Frizzy Hair Naturally
💖 Final Thoughts
Protecting your hair while you sleep doesn’t have to be complicated. Start with one or two of these steps and build from there.
Even just switching to a silk pillowcase and tying your hair up loosely can make a noticeable difference in just a few days!
Want personalized hair care advice? Book an appointment with Jonathon at The WannaBee Hair Studio — where every client leaves with healthy, beautiful hair. Book Now
10 Best Anti-Frizz Products That Actually Work (For Smooth, Sleek Hair)
This post contains affiliate links. As an Amazon Associate I earn from qualifying purchases at no extra cost to you.
✨ 10 Best Anti-Frizz Products That Actually Work
If frizz is ruining your style (especially on humid days), the right products can completely change your hair game.
Frizz happens when the hair cuticle lifts and absorbs moisture from the air, which is why hydration and sealing the cuticle are key to smooth hair .
Below are some of the best anti-frizz products—from budget-friendly finds to salon favorites—that actually help smooth, protect, and control your hair.
💧 1. Leave-In Treatments (Best Overall Frizz Control)
Amika Hydro Rush Leave-In Conditioner
$31.00•Leave-in conditioner for intense moisture and shine.
4.6

Why they work:
Leave-in treatments hydrate and coat the hair, preventing moisture from entering and causing frizz.
👉 Best for: Dry, damaged, or everyday frizz control
🧴 2. Anti-Frizz Serums (Instant Smooth + Shine)
Why they work:
Serums use silicones and oils to smooth the hair cuticle and add shine—one of the fastest ways to tame flyaways.
👉 Best for: Quick fixes and finishing touches
🌬️ 3. Anti-Humidity Sprays (Your Secret Weapon)
Why they work:
These create a barrier around your hair to block humidity—one of the biggest causes of frizz.
👉 Best for: Hot, humid weather
🧼 4. Frizz-Control Shampoo & Conditioner

4.6
Why they work:
Frizz control starts in the shower. Hydrating formulas help smooth hair before styling even begins.
👉 Best for: Long-term frizz prevention
🧴 5. Smoothing Creams (Soft, Natural Finish)

4.5
Why they work:
They provide control without stiffness, making hair feel soft and natural.
👉 Best for: Thick, curly, or textured hair
🛏️ 6. Overnight Frizz Protection (Bonus Must-Have)

4.5
Why they work:
Reducing friction while you sleep helps prevent frizz before it starts.
👉 Best for: Morning frizz prevention
💖 Final Thoughts
The best anti-frizz hair products all do one thing well:
👉 They hydrate, seal, and protect your hair from moisture.
You don’t need everything—start with:
- A leave-in conditioner
- A serum or oil
- A humidity shield (if needed)
Once you find your combination, frizz becomes much easier to manage.
Want personalized product recommendations for YOUR hair type? Book a consultation with Jonathon at The WannaBee Hair Studio — he’ll recommend exactly what your hair needs. Book Now